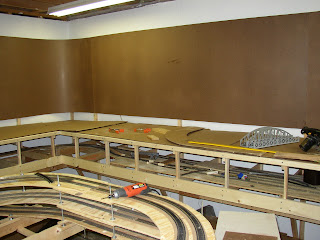
We wanted to have the view of a sky and distant hills on the wall to add more depth and realism. We discovered 3 ways to do this:
- use the existing wallboard
- use hardboard
- use floor linoleum
We did not like #1 as the wall was not all that smooth (it is a basement after all) and we did not feel like trying to get a primer of the right texture that would work.
 #3 was an idea we discovered after we choose, basically go to your local big box home improvement store and get some scrap or remnant pieces of linoleum. Color does not matter as you will be placing the "colored" side to the wall leaving the underside out. bends easy and is easy to work with. Dern, to late for us.....
So option 2 was the choice. We cut the hardboard into 3' strips (the space from the top of the landscape level to near the ceiling), and attached to the furring strips with 3/4" wall board screws.

I went to the paint department of the big box store and got a bunch of the blue paint swatches. I brought these and a couple pictures of mountain scenes we liked the colors of (mainly the sky) down to the room and laid them out under the same lights the layout would use. Important to use the same lighting as your vision perception of color changes with type of color. You do not even realize how much until you use a camera without flash and look at the results. Who has not taken a picture of someone under incandescent bulbs that looked good at the time, but you were shocked how yellow the shot became under the neutral eye of a camera.
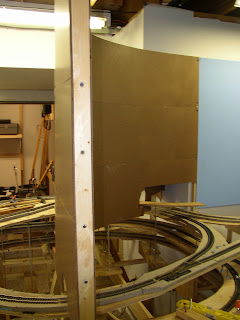
You can see the hardboard bent at a nice radius in the corner (linoleum would have been easier!) but we had to watch it as it wanted to flex to the wall if we were not careful putting it up.
.

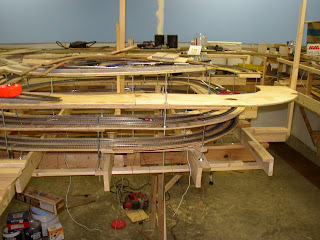
 We decided on that split the helix at the inside corner of the L in the room about 50/50. This gave us the ability to change scenes between sides of the wall and forced a person to have to walk around the entire L to see the rest of the room. Accidentally ended up being a real nice dramatic effect as you walk and keep seeing more.... From that decision we needed a S type bend (as seen in the left pic) and a C shape backed up to it (as seen on the right pic) We ended up using the short strips cut off the other sheets and I cut some braces (1" boards with the curves cut in on both sides) to put between the hard board sheets. Ended up working pretty good.
We picked the color that most closely matched the picture and had a quart mixed. If you look at pics you will notice a couple things about the sky. It is a lighter blue near the horizon and much deeper as you get closer to the zenith. Since we were mainly dealing with sky closer to the horizon we choose the color applicably.
Also on trees you paint in the background the more distant the bluer they are. So choose your near tree color and add little bits of sky blue into the color as you move back.
As you can see above we initially painted the hardboard thinking the seams and screws would not be that visible once painted. We were wrong. They really showed. So we had to treat the screws and seams like we would if this was wallboard. It was spackle time.......
Time to think about horizons and clouds.......
No comments:
Post a Comment